7 Things to Know Before You Build a Homemade Water Jet Cutter
The power of water has always been fascinating. From shaping grand canyons over millennia to modern industrial applications, its force is undeniable. Imagine harnessing a sliver of that power on your workbench to slice through metal, stone, and tile with precision. This is the allure of a homemade water jet cutter. While commercial systems cost a fortune, the DIY spirit has found a way to create functional, albeit less powerful, versions. This article delves deep into the world of DIY water jets, exploring how they work, what it takes to build one, and the critical challenges you’ll face.
What Exactly is a Homemade Water Jet Cutter?
At its core, a water jet cutter is a tool that uses a very high-pressure stream of water, often mixed with an abrasive substance, to cut through materials. A commercial homemade water jet cutter operates at pressures exceeding 60,000 PSI. A DIY version, however, typically works at much lower pressures, usually between 10,000 and 40,000 PSI, depending on the pump used. The fundamental principle remains the same: pressurize water, focus it through a tiny nozzle (often a gemstone like ruby or diamond), and direct it onto the workpiece. For cutting hard materials, an abrasive grit (like garnet) is introduced into the stream just before the nozzle. The creation of a homemade water jet cutter is a complex engineering project that blends knowledge of fluid dynamics, high-pressure systems, and CNC control.
The Core Components of a DIY System
Building a functional homemade water jet cutter requires sourcing or fabricating several key components. Understanding each part’s role is the first step in the design process.
High-Pressure Pump: This is the heart of the system. DIY builders often use intensifier pumps or modified pressure washers. Industrial pressure washers can reach up to 40,000 PSI, which is a common starting point for a serious homemade water jet cutter project.
Nozzle Assembly: This is where the magic happens. The assembly includes an orifice (which creates the thin, fast stream) and a mixing tube (where abrasive is added and the cutting stream is formed). The orifice is typically a small jewel, and the mixing tube is a long, narrow tube made of a very hard material like tungsten carbide.
Abrasive Delivery System: For cutting anything harder than foam or rubber, you need an abrasive hopper. This system precisely meters a flow of abrasive grit (like 80-grit garnet) into the water stream. It uses a venturi effect, where the high-speed water jet creates a vacuum that draws the abrasive down into the mixing chamber.
CNC Motion Platform: To make precise cuts, the nozzle must move accurately in at least two dimensions (X and Y). Most builders repurpose parts from old CNC routers or 3D printers, using stepper motors, linear rails, and a controller like a Raspberry Pi or an Arduino running software such as GRBL.
Catching Tank: The high-energy stream doesn’t just disappear after cutting the material; it continues with immense force. A robust catching tank, filled with water, is essential to dissipate this energy safely and to capture the used abrasive and cut-out material fragments.
The Build Process: A High-Level Overview
Constructing a homemade water jet cutter is not a single weekend project. It’s a marathon that involves meticulous planning and execution. The process generally follows these steps:
Design and Sourcing: Create detailed CAD models for the frame, nozzle mount, and abrasive hopper. Source the critical components, especially the high-pressure pump and the nozzle assembly.
Building the Frame and Gantry: Construct a rigid and sturdy frame to support the gantry system that will hold the nozzle. Any flex or vibration will result in inaccurate cuts.
Integrating the CNC Electronics: Assemble the stepper motors, drivers, and controller. Configure the control software to manage the movement of the gantry.
Assembling the High-Pressure Side: This is the most dangerous part. Connect the pump to the nozzle using specialized high-pressure plumbing and fittings. Every connection must be rated for the maximum pressure you intend to use.
Testing and Calibration: Start with low-pressure water-only tests to check for leaks and basic functionality. Gradually increase pressure and, finally, introduce abrasive to begin test cuts on scrap material.
Material Capabilities and Limitations
A common question is, “What can a homemade water jet cutter actually cut?” The answer depends heavily on the pump’s pressure and the system’s overall quality.
What It Can Cut: Even a lower-pressure DIY system can effectively cut a wide range of materials. This includes woods, plastics, rubber, foam, aluminum, thin mild steel, copper, and titanium. It excels at materials that are sensitive to the high heat generated by plasma or laser cutters.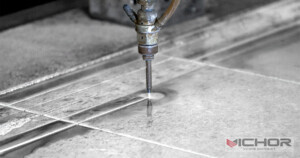
Its Limitations: A homemade water jet cutter will struggle with very thick or extremely hard materials. Cutting thick steel plate or hardened tool steel is typically beyond the capability of all but the most advanced DIY builds. The cut edge might also be less polished than a commercial machine’s, often exhibiting a slight taper (kerf taper) and a rougher surface finish at the bottom of the cut.
Critical Safety Considerations: Non-Negotiable
Safety cannot be overstated when working with equipment that uses water under extreme pressure. A pinhole leak in a high-pressure line can inject water directly into your skin, causing severe injury. Flying abrasive particles and debris are also significant hazards.
Pressure Enclosure: The entire cutting area, including the nozzle and workpiece, must be fully enclosed with interlock switches that disable the pump if the door is opened.
High-Pressure Rated Components: Never use standard plumbing fittings. All tubing, connectors, and valves must be explicitly rated for the maximum pressure of your system.
Personal Protective Equipment (PPE): Always wear safety glasses and heavy-duty gloves when working near the pressurized system.
Emergency Shut-offs: Install easily accessible emergency stop buttons that kill power to the pump and motors instantly.
5 Common Problems with a Homemade Water Jet Cutter
Even a well-built system will encounter issues. Here are the most frequent problems DIYers face.
Inconsistent Abrasive Flow: This is the number one issue. If the abrasive doesn’t flow smoothly, the cutting power fluctuates, leading to incomplete cuts. This can be caused by moisture in the abrasive (causing clumping), a clogged feed line, or an incorrectly designed venturi in the mixing assembly.
Nozzle Clogging and Wear: The orifice and mixing tube are consumable parts. The abrasive stream erodes them over time. A worn nozzle will produce a wider, less focused stream, drastically reducing cutting power and accuracy. It’s common to go through several mixing tubes in a day of heavy cutting.
Leaks in High-Pressure Lines: Despite best efforts, high-pressure water will find the weakest point. Leaks are not just messy; they are dangerous. Constant vigilance and the use of proper seals and fittings are required.
Poor Cut Quality (Kerf Taper and Lag): The water jet stream naturally widens as it travels, causing the top of the cut to be slightly wider than the bottom (kerf taper). There’s also a “lag” or lead-in error when cutting curves, where the jet doesn’t turn a sharp corner perfectly. Advanced CNC software can compensate for these phenomena, but tuning it is complex.
Pump Maintenance and Failure: High-pressure pumps, especially modified ones, are under immense stress. Seals fail, valves wear out, and motors can burn out. Maintaining the pump is a significant part of owning a homemade water jet cutter.
Is Building a Homemade Water Jet Cutter Right for You?
Building a homemade water jet cutter is a premier DIY challenge. It is not for the faint of heart or the inexperienced maker. It requires a significant investment of time, money, and a deep understanding of mechanics, electronics, and, most importantly, safety protocols. The reward, however, is a unique and incredibly versatile tool capable of cutting complex shapes in a vast array of materials without heat-affected zones. If you are an advanced hobbyist or a prototyping professional with the necessary skills and respect for the risks involved, the journey of building your own water jet can be an immensely satisfying project. For most, however, outsourcing cutting to a professional service may be a more practical and safer option.